Thursday, December 24, 2009

Panning – shooting moving subjects

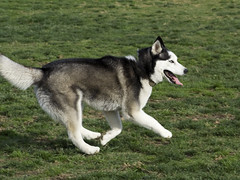
Last weekend I took my dog Ivan to the local dog park, and decided to experiment with panning. Panning is a technique where you follow a moving subject with your camera, producing a picture with a relatively sharp subject and a blurred background. Panning can emphasize the speed and motion of your subject.

To pan, use a relatively slow shutter speed. When your subject approaches, follow the subject with your camera. Press the shutter as the subject crosses in front of you, and continue to follow the subject after the shutter closes. This will help you maintain a smooth shot from start to finish.

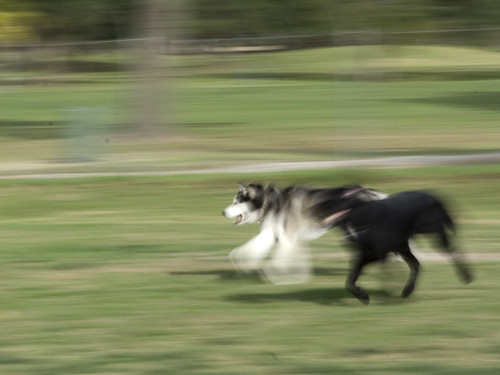
This was my first experiment with panning, and I still need more practice. Here are some of the best from the day.

For comparison, a non-panned shot, taken at 1/640 shutter speed.
IMG_7630


This is Ivan and a friend. It was hard to predict when and which direction he would go.
IMG_7634


This dog was chasing a ball with more consistency, so I tried out some shots on him.
IMG_7679

What did I learn?
  • Panning works best when the subject is moving in a relatively straight line at an angle perpendicular to your position. Subjects that are moving erratically can result in shots that are rather messy. The perpendicular position provides the greatest emphasis to your subject’s speed.
  • Panning takes a lot of practice. Even when you master this technique, you’ll end up with a lot of duds.
  • Panning is easier when you can anticipate the action. The dog park is not the ideal setting for practicing. For practice, cars on a busy street would be easier and more predictable.
For more information about panning, see Mastering Panning – Photographing Moving Subjects.

Sunday, December 13, 2009

When there’s not enough light

I hate carrying around a tripod. Even the little ones like the Gorillapod (Joby GP3 Gorillapod SLR-Zoom Flexible Tripod for Digital SLR Cameras). But these days it seems like I always want to take pictures when there’s not enough light. Low light means slow shutter speeds, where even a little bit of camera shake can turn your picture into a bunch of wavy lines. What can you do to reduce camera shake when you can’t (or don’t want) to use a tripod?

  1. Hold your camera steadily. Keep your elbows close to your side. If you have a DSLR camera, support your camera lens with your other hand.
  2. Brace yourself. Find something to lean against. Lean your elbows on a convenient surface. Or sit, and lean your elbows on your knees.
  3. Brace your camera. Lean the camera against a pole or wall.
  4. Hold your breath when you click the shutter.

Recently, I walked around the Naples (Long Beach, California) canals to see the Christmas lights. I brought along my camera with my fastest (and lightest) lens, just to see what I could capture. Using the tips above, I was able to get several clear shots of the lights and decorations. (I also got a lot of fuzzy shots, especially of the reflections in the water.)

What did I learn?

  • My camera is slow. It’s old. I can’t wait until next year when I’ve saved enough for the next generation of digital camera.
  • Even so, remembering these tips helps. About a third of my pictures turned out in focus, even though most of the shots were taken at a shutter speed of less than 1/20.